
Automate Solar Lead Qualification & Follow-ups with Google Sheets and Gmail
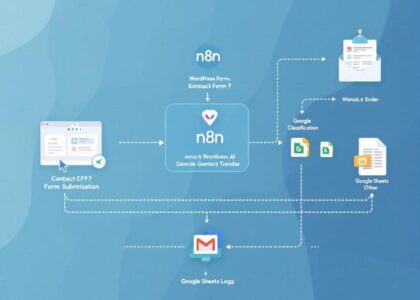
Note: This template is designed for self-hosted n8n instances. The workflow image above shows the complete automation flow.
This n8n workflow automates the entire solar lead qualification process – from capturing lead information through a webhook, storing data in Google Sheets, evaluating qualification criteria, and sending personalized email follow-ups based on qualification status.
Who is this for?
This workflow is designed for:
- Solar installation companies
- Solar sales teams
- Renewable energy consultants
- Lead generation specialists in the solar industry
What problem does this workflow solve?
Managing solar leads efficiently can be challenging. This workflow solves several key pain points:
- Time-consuming manual lead qualification: Automatically evaluates leads against predefined criteria
- Inconsistent follow-up: Ensures every lead receives a timely, personalized response
- Document management: Securely stores and shares utility bill documents
- Lead tracking inefficiency: Centralizes lead data in Google Sheets with qualification status
What this workflow does
This workflow creates a complete solar lead management system that:
- Captures lead information through a webhook endpoint
- Securely stores utility bill uploads in Google Drive
- Records all lead data in Google Sheets
- Automatically evaluates leads based on three qualification criteria:
- Homeownership status
- Credit score (must be 650+)
- Absence of trees on roof
- Updates qualification status in the Google Sheet
- Sends personalized email follow-ups based on qualification status:
- Qualified leads receive a congratulatory email with next steps
- Disqualified leads receive helpful information about why they didn’t qualify and suggestions for remediation
Setup
Prerequisites
Before setting up this workflow, you’ll need:
- A self-hosted n8n instance
- Google account with access to:
- Google Sheets
- Google Drive
- Gmail
- A form on your website that can make POST requests to a webhook
Step 1: Google Sheets Setup
- Create a new Google Sheet for storing leads
- Add the following columns in the first row (exact naming is important):
- Name
- Address
- Has Trees on Roof
- credit score
- phone
- Zip code
- Homeowner
- utility bill
- Qualification status
- Disqualification reason
Step 2: Google Drive Setup
- Sign in to your Google Drive account
- Create a folder named “Solar Lead Utility Bills” (or your preferred name)
- Right-click on the folder and select “Share”
- Set permissions to “Anyone with the link can view”
- Note the folder ID from the URL for configuration (the long string after /folders/ in the URL)
Step 3: Configure Google Credentials in n8n
- In your n8n instance, go to Settings → Credentials
- Add credentials for:
- Google Sheets: Create new credentials, follow OAuth2 authentication
- Google Drive: Create new credentials, follow OAuth2 authentication
- Gmail: Create new credentials, follow OAuth2 authentication
- Ensure all credentials have the necessary scopes:
- Google Sheets: …/auth/spreadsheets
- Google Drive: …/auth/drive
- Gmail: …/auth/gmail.send
Step 4: Import and Configure the Workflow
- In n8n, go to Workflows → Import from File
- Upload the workflow JSON file
- Update all Google Sheets nodes with your Google Sheet document ID:
- Open your Google Sheet
- Copy the ID from the URL (long string between /d/ and /edit)
- Update the document ID field in the Google Sheets nodes
- In the “[STEP 2] Upload Utility Bill” node, set the folder destination to your created folder
Step 5: Configure the Webhook
- Activate the “[STEP 1] Receive Form Submission” webhook node
- Copy the generated webhook URL
- Configure your website form to send data to this URL
- Ensure your form submits the following fields with exact naming:
- firstName
- lastName
- address
- hasTreesOnRoof
- creditScore
- phone
- zipCode
- homeOwnership
- utilityBill (file upload)
Step 6: Customize Email Templates
- Open the “[STEP 10A] Send Acceptance Email” node
- Customize the email subject and message to match your company’s branding
- Open the “[STEP 10B] Send Rejection Email” node
- Customize the rejection email to reflect your company’s voice
Step 7: Activate and Test
- Click “Save” on the workflow
- Toggle the “Active” switch to activate the workflow
- Submit a test lead through your form
- Check that:
- The data appears in your Google Sheet
- The qualification status is updated correctly
- The appropriate email is sent
How to customize this workflow to your needs
Adjusting Qualification Criteria
You can modify the qualification logic in the “[STEP 7] Check Qualification Criteria” node:
- Open the node and click the “Edit Code” button
- Locate the criteria sections (homeowner, credit score, trees on roof)
- Modify the conditions as needed:
// Example: Change credit score threshold
if (creditScoreRaw.includes("600 - 649") ||
    creditScoreRaw.includes("650 - 689") ||
    creditScoreRaw.includes("690 - 719") ||
    creditScoreRaw.includes("720+")) {
    creditQualified = true;
}
- Add additional criteria if needed
Customizing Email Templates
Personalize your emails further:
- Open the email nodes
- Use variable references to include more customer data:
Dear {{ $json.Name }},

We noticed your utility bill shows an average of {{ $json.monthlyBill }} per month.
With solar, you could save approximately {{ $json.monthlySavings }}.
Adding Integration with CRM Systems
Extend this workflow by connecting it to your CRM:
- Add a Hubspot/Salesforce/etc. node after the “[STEP 8] Update Qualification Status” node
- Configure the node to create or update contacts in your CRM
- Map the lead data fields to your CRM fields
Troubleshooting
Common Issues
-
Webhook not receiving data
- Verify your form is correctly configured to send POST requests
- Check CORS settings on your website
- Ensure all required fields are being sent
-
Google Drive upload failing
- Check Google Drive permissions
- Verify your OAuth scopes include drive.file
- Ensure your Drive has sufficient storage space
-
Email not sending
- Verify Gmail credentials
- Check if Gmail API is enabled in your Google Cloud Console
- Look for Send Rate Exceeded errors in execution logs
Google Sheets Column Format
If you’re having issues with data not appearing correctly:
- Make sure the column names exactly match those in the code
- Check that the Google Sheet permissions allow editing
- Verify the sheet name is correctly referenced in the nodes
Getting Help
If you encounter issues with this template, you can:
- Check the n8n documentation on webhooks
- Review Google Sheets integration documentation
- Post in the n8n community forum
This template was created by David Olusola. If you find it helpful, please consider giving it a star in the n8n template library!